


Grid Charging Guides.
Fox ESS Grid Charging Guide – Desktop PC
This guide is for customers with an operational Fox ESS battery storage system. It will outline the process of how customers can utilise the grid charging function of their batteries. The main benefit of this, is to take advantage of cheaper off-peak tariffs, such as Octopos Go & Octopus Flux (other energy suppliers are available).
Using the grid charge function of the batteries, our customers can fill their batteries with cheaper energy (e.g. 9p/kWh) by charging them overnight. This power could then be dispersed to the household at peak times, when the customer would normally pay peak prices for energy (e.g. 27p/kWh). In this scenario the customer would be saving 18p per kWh. If they had a usable battery capacity of 10kWh, this would be a saving of £1.80 per day, or £162 per quarter. (Savings assume client uses the full 10kWh of energy each day).
Step 1:
- - Using a desktop PC or laptop, open your web browser and enter the following URL: https://www.foxesscloud.com/.
- - Enter the username and password to log in to your monitoring system.
Step 2:
- - Once logged in to your monitoring, select Device, then Inverter from the drop down menu (screenshot below).

Step 3:
- - That will take you to a page showing your inverter SN, model etc. There are two small icons under “Operation” which is to the far right of the page. You want to select the icon on the left, there is a screenshot below.

Step 4:
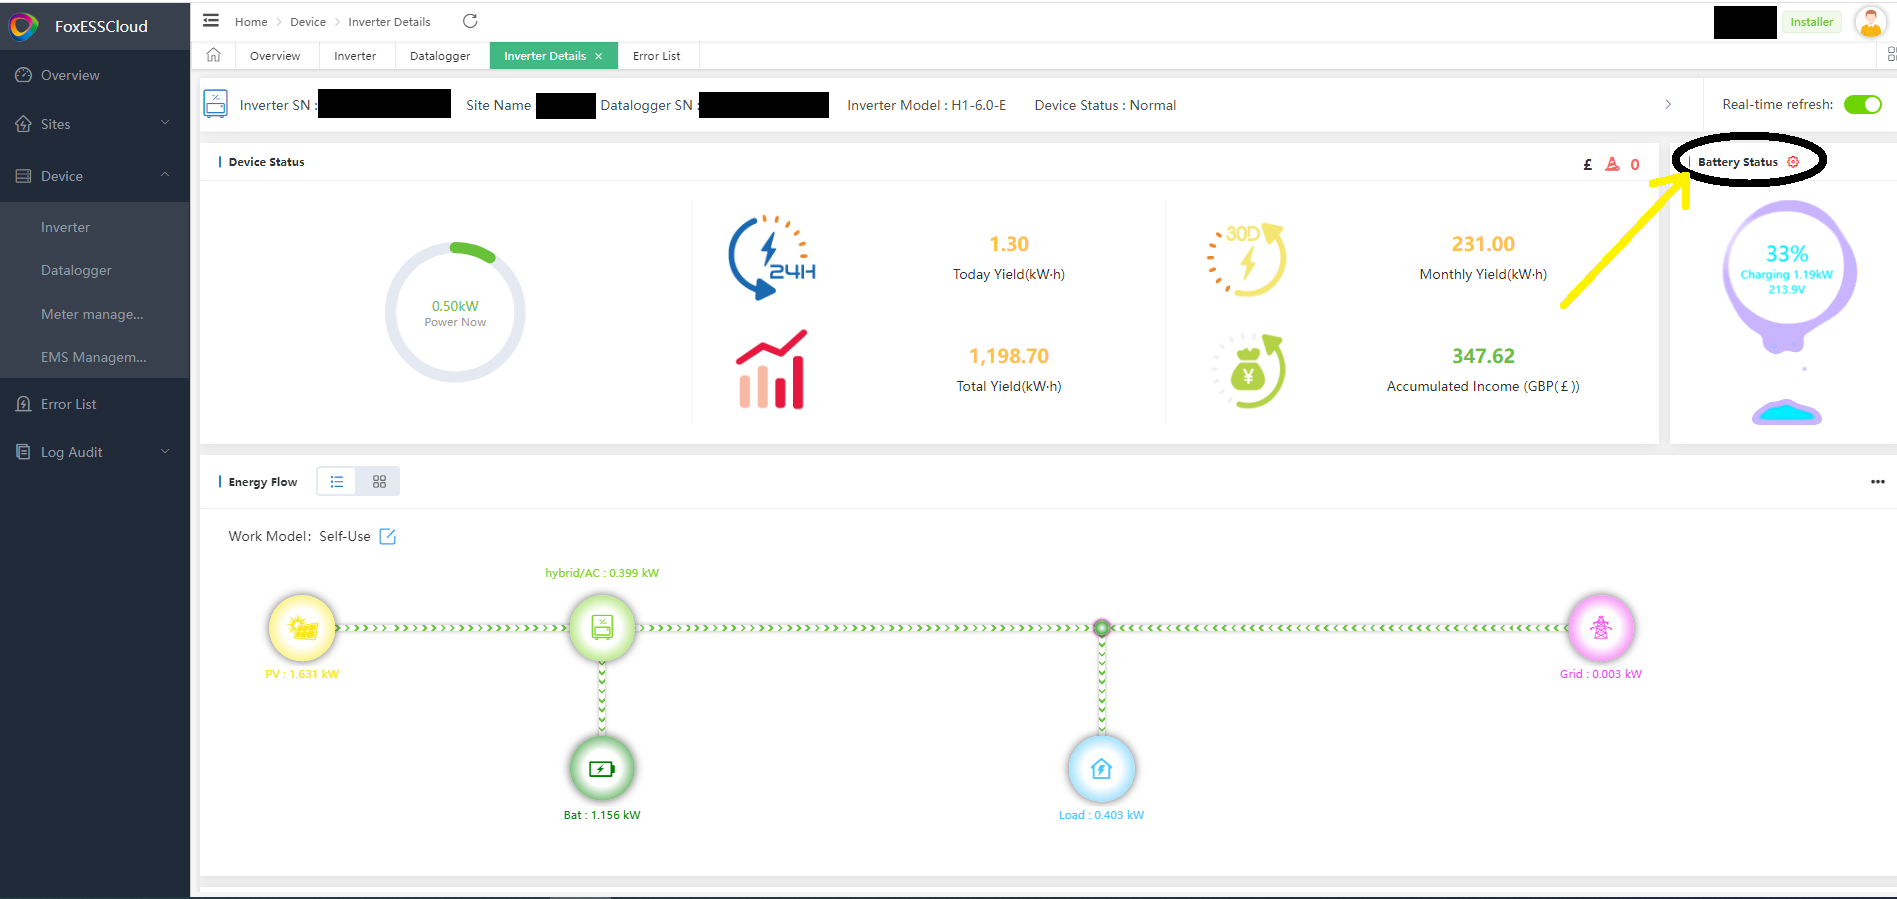
- - This will take you to a screen showing a flow chart depicting the live function of your system. You now want to click on the small Cog wheel, that is to the right of “Battery Status”. Screenshot again below with the cog circled.
Step 5:
- - This will bring up a small pop up window, which is where you will enter the time period that you would like the battery to charge up from the grid. For this example, I have used the time period of 02:00-05:00, which is a common off-peak period under the Octopus Flux tariff. Please check your own tariff times and input the period which gives you the cheapest rate.
- - Please enter the start period on the left, and the end period on the right. Screenshot below giving an example.
- - Once time periods are entered please ensure you click “Save” to keep this setting. Otherwise it will revert to default settings.
- - Please only alter time period 1 and leave time period 2 as it is.

Further information:
To disable grid charging, please follow steps 1-4, and when you get to the window showing the grid charge periods, please change all times to 00:00. This is the default setting and should stop the system from grid charging.
Download: Fox ESS Grid Charging Guide